
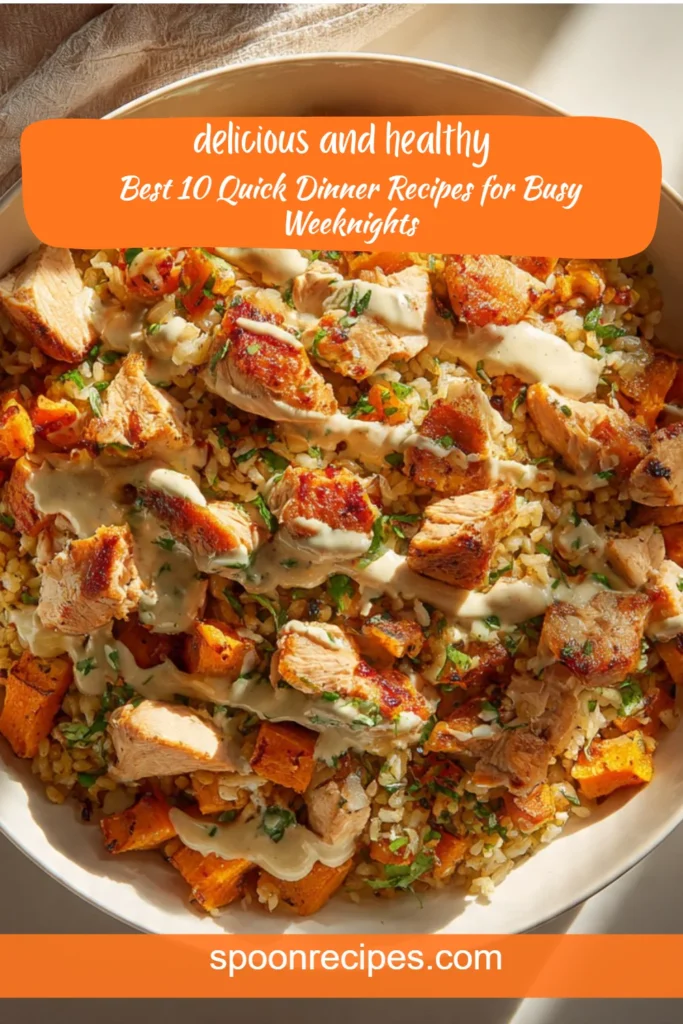
As someone who often juggles a busy schedule, I know how challenging it can be to whip up a healthy dinner on weeknights. That's why I’ve compiled this list of my favorite quick dinner recipes that not only save time but are also delicious and satisfying. From Garlic Butter Steak Bites that can be made in just 15 minutes to the comforting Chicken Cordon Bleu Casserole, each recipe comes with easy-to-follow tutorials that will have you in and out of the kitchen in no time. Prepare to impress your family with meals that are both nutritious and delightful without sacrificing your precious time!
1. Healthy Chicken & Sweet Potato Rice Bowl
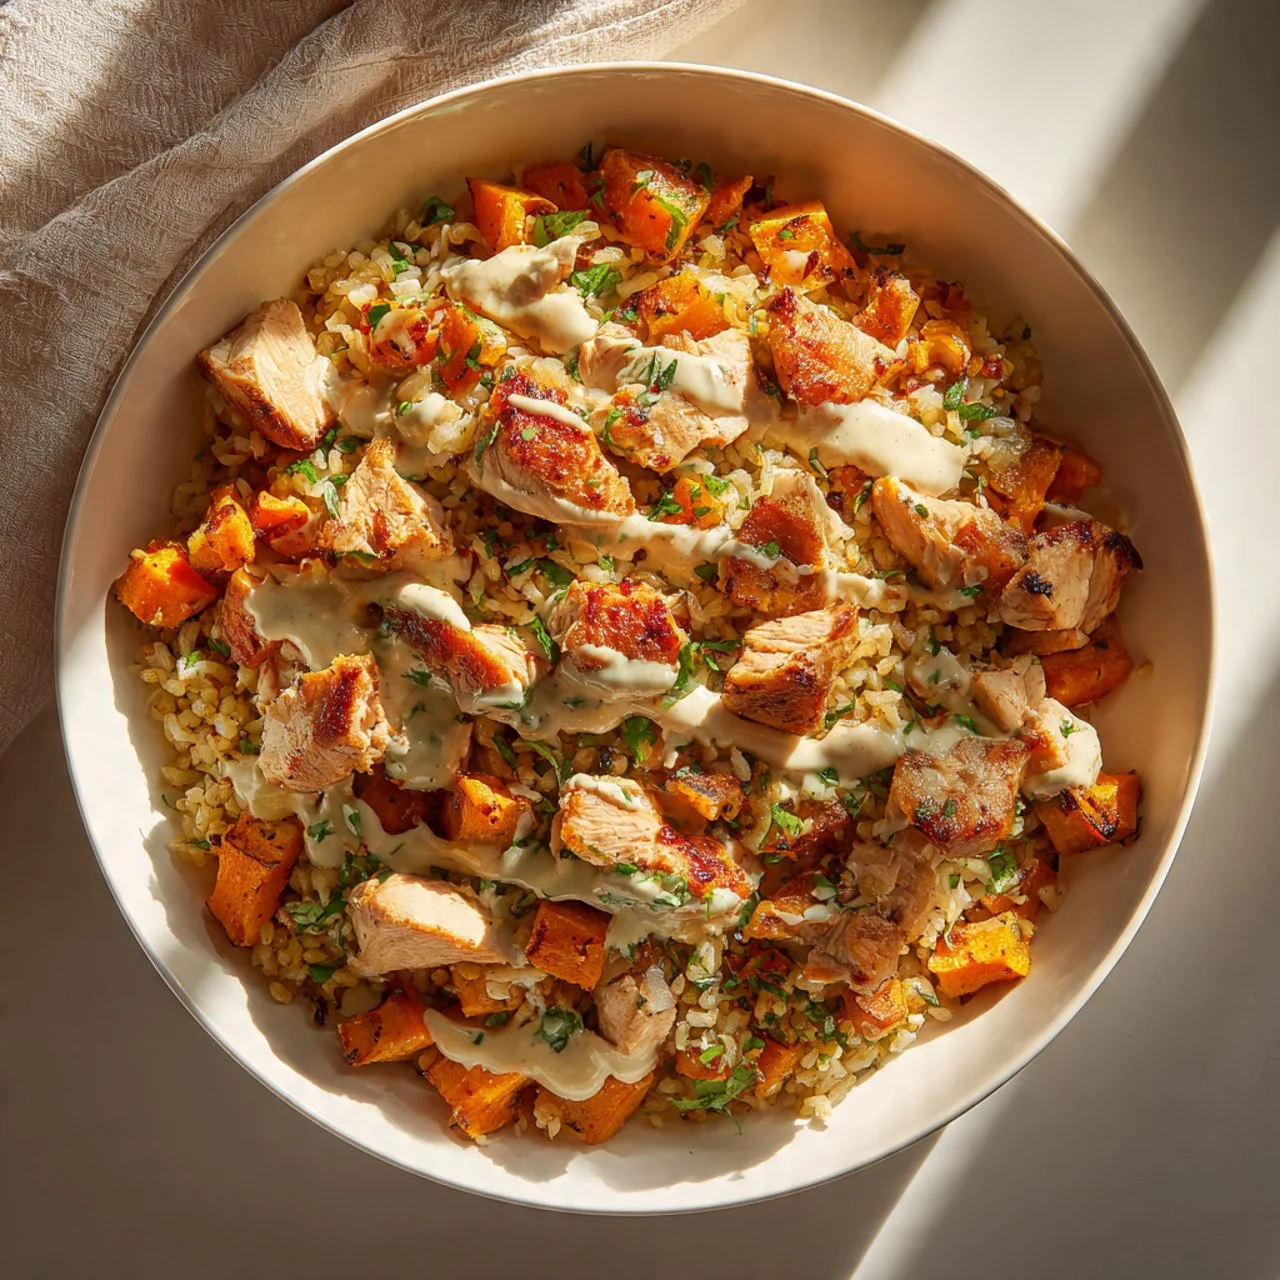
There’s something comforting about a warm bowl filled with vibrant colors and wholesome ingredients. I remember the first time I made a chicken and sweet potato dish for my family; the smell filled the kitchen and had everyone gathered around the table, eager to dig in. This Healthy Chicken & Sweet Potato Rice Bowl has become a staple in my home because it’s not only delicious but also nutritious. It’s a dish I feel good about serving, knowing it fuels our bodies and satisfies our taste buds. The combination of tender chicken, creamy sweet potatoes, and fluffy rice makes this bowl special and hearty, perfect for any day of the week.
why make this recipe
This recipe is perfect for anyone looking to enjoy a nutritious meal without spending hours in the kitchen. It’s simple, quick, and packed with flavors that everyone will love. Using sweet potatoes provides natural sweetness and loads of vitamins, while chicken offers lean protein for energy. Plus, it’s easily customizable with your favorite spices or fresh greens, making it a versatile option for meals throughout the week.
how to make Healthy Chicken & Sweet Potato Rice Bowl
Ingredients:
- 1 lb boneless, skinless chicken breasts
- 2 medium sweet potatoes, cubed
- 1 cup cooked rice (white or brown)
- 2 tablespoons olive oil
- Salt and pepper to taste
- Optional: garlic powder, smoked paprika, or herbs
- Fresh greens (optional, for serving)
Directions:
- Preheat the oven to 400°F (200°C).
- Toss the cubed sweet potatoes with olive oil, salt, and pepper (and any optional spices) and spread them on a baking sheet. Roast for 25-30 minutes or until they are tender.
- While the sweet potatoes are roasting, season the chicken breasts with salt, pepper, and any additional spices.
- Heat a skillet over medium-high heat with a bit of olive oil. Cook the chicken breasts for 6-7 minutes on each side, or until they are fully cooked (internal temperature of 165°F/75°C).
- Let the chicken rest for a few minutes before slicing.
- To assemble the bowls, start with a base of cooked rice, add roasted sweet potatoes, and top with sliced chicken. Serve with fresh greens if desired.
how to serve Healthy Chicken & Sweet Potato Rice Bowl
Serve your Healthy Chicken & Sweet Potato Rice Bowl warm. You can enjoy it as a cozy dinner or a hearty lunch. Add fresh greens on the side for a burst of color and additional nutrients. A squeeze of lemon can also brighten up the flavors.
how to store Healthy Chicken & Sweet Potato Rice Bowl
If you have leftovers, store them in airtight containers in the refrigerator for up to three days. Reheat in the microwave until hot. Keep the fresh greens separate until you are ready to eat to maintain their crispness.
tips to make Healthy Chicken & Sweet Potato Rice Bowl
- To save time, you can use pre-cooked rice.
- Experiment with different spices to change the flavor, like Italian herbs or chili powder for a kick.
- If you prefer, you can grill the chicken instead of cooking it in a skillet for a smoky flavor.
variation
You can easily adapt this recipe by swapping the chicken for grilled shrimp or tofu for a vegetarian option. Feel free to add other vegetables like broccoli or bell peppers for extra color and nutrition.
FAQs
1. Can I use frozen sweet potatoes?
Yes, you can use frozen sweet potatoes, but make sure to adjust the cooking time as they may take longer to roast.
2. Is this recipe gluten-free?
Yes, this recipe is gluten-free if you use gluten-free rice. Make sure to check any spices or products used as well.
3. Can I make this dish in advance?
Absolutely! You can prepare the sweet potatoes and chicken ahead of time. Just reheat everything when you’re ready to serve.
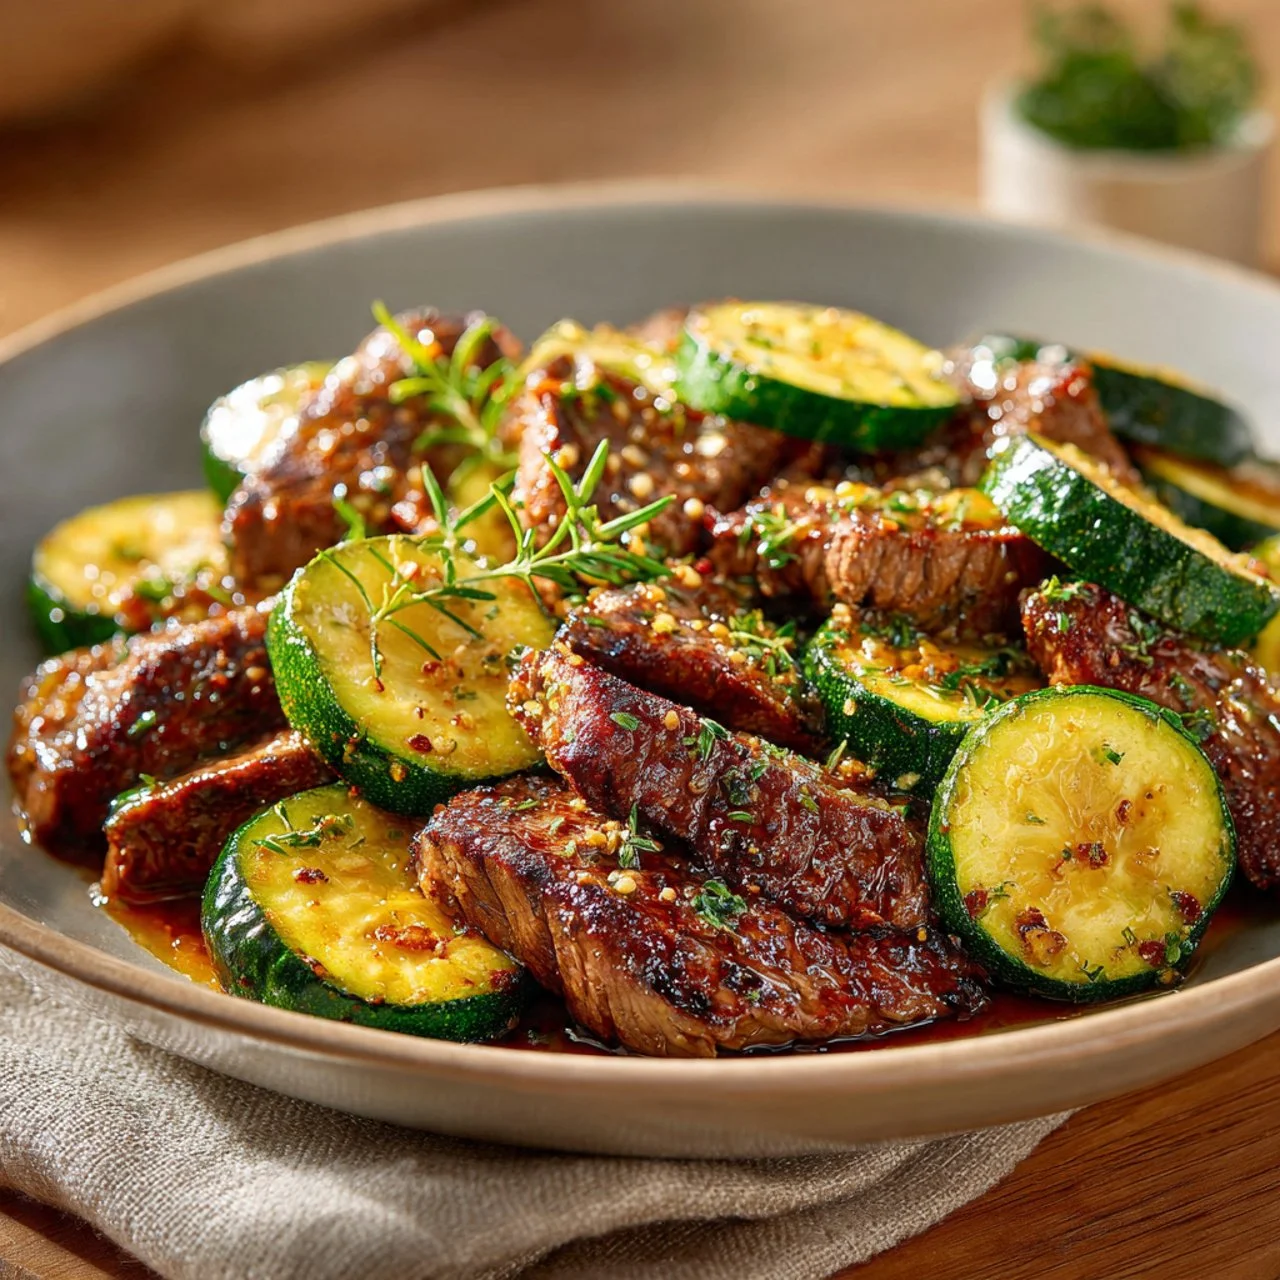
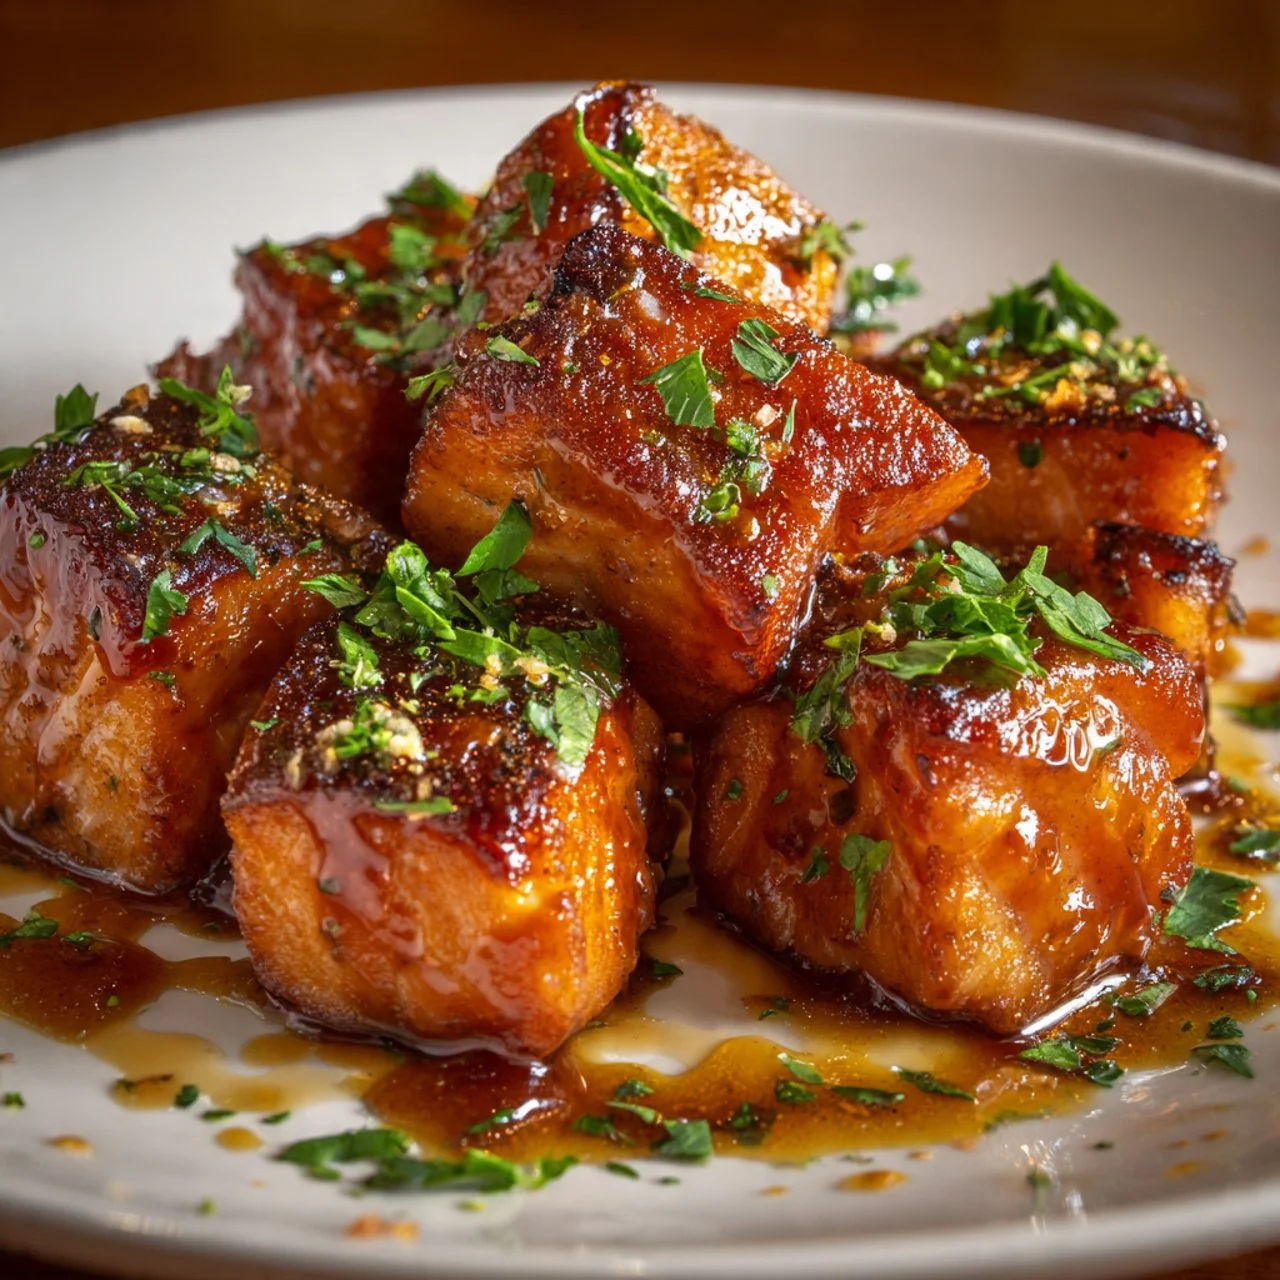
2. Garlic Butter Steak Bites: A 15-Minute Miracle Dinner
Warm, Personal Introduction
There’s something magical about the aroma of garlic sizzling in butter that instantly draws me into the kitchen. I remember the first time I made these Garlic Butter Steak Bites; it was a busy weeknight, and I needed something quick yet flavorful. As I stood over the skillet, the rich smell filled my home, bringing my family to the table, eager for a delicious meal. This recipe means a lot to me because it strikes the perfect balance between gourmet and quick weeknight dinner. In just 15 minutes, you can have tender steak and fresh vegetables, all coated in a rich garlic butter sauce that’s truly special.
Why Make This Recipe
Garlic Butter Steak Bites are the ideal solution for busy evenings when you crave something tasty yet don’t have a lot of time. This recipe is not only quick to prepare but also uses simple ingredients that you might already have at home. Plus, it’s versatile enough to please both meat lovers and those looking for fresh vegetables. These bites are full of flavor and will have everyone coming back for seconds.
How to Make Garlic Butter Steak Bites
Ingredients:
- 1 lb steak (sirloin, ribeye, or New York strip), cut into 1-inch cubes
- 1 medium zucchini, cut into half-moons
- 3 tablespoons butter
- 3 cloves garlic, minced
- 1 tablespoon olive oil
- 1/2 teaspoon salt
- 1/4 teaspoon black pepper
- Optional: Fresh parsley, chopped, for garnish
Directions:
- Pat the steak bites dry with paper towels and season them with salt and pepper.
- Heat olive oil in a large skillet over medium-high heat.
- Add the steak bites to the hot skillet in a single layer. Sear for 1-2 minutes per side until browned. Remove the steak from the skillet and set aside.
- Add butter to the same skillet. Once melted, add minced garlic and cook for about 30 seconds until fragrant.
- Add the zucchini to the skillet. Cook for 3-5 minutes, stirring occasionally, until tender-crisp.
- Return the steak bites to the skillet. Toss everything together to coat with the garlic butter.
- Cook for another 1-2 minutes until the steak is heated through.
- Garnish with fresh parsley if desired. Serve immediately.
How to Serve Garlic Butter Steak Bites
These steak bites are best served hot right from the skillet. You can enjoy them on their own or pair them with a side of rice, mashed potatoes, or a simple salad for a complete meal. If you want to impress your guests, serve them on skewers for a fun presentation!
How to Store Garlic Butter Steak Bites
If you have leftovers, store them in an airtight container in the refrigerator. They will keep well for about 2-3 days. You can reheat them on the stovetop or in the microwave, but be careful not to overcook the steak again to keep it tender.
Tips to Make Garlic Butter Steak Bites
- Make sure to cut the steak into even-sized cubes for uniform cooking.
- Pat the steak dry well; this will help you achieve a good sear.
- You can add other vegetables like bell peppers or mushrooms for extra flavor and nutrients.
- If you love a little heat, consider adding red pepper flakes when cooking the garlic.
Variation
If you want to switch things up, you can use shrimp instead of steak for a tasty seafood version. The cooking time will be slightly less, so adjust accordingly.
FAQs
Can I use frozen steak?
Yes, you can use frozen steak. Just make sure to thaw it completely, and pat it dry before seasoning.
What if I don’t have zucchini?
You can substitute with other vegetables such as bell peppers, asparagus, or broccoli.
Can I make this recipe ahead of time?
While it’s best enjoyed fresh, you can prepare the steak and veggies in advance and heat them up when you’re ready to eat.
3. No-Bake Peanut Butter Energy Bites

I still remember the first time I made No-Bake Peanut Butter Energy Bites. The sweet and nutty aroma filled my kitchen, making my mouth water as I mixed the ingredients. This simple, easy recipe quickly became a favorite treat for my family and me. It’s perfect for those busy days when you want a quick snack that is both delicious and nutritious. I love to reach for these energy bites when I need a little boost or as a treat during movie nights with my kids. What’s special about this recipe is how easy it is to make and how you can enjoy them without turning on the oven!
why make this recipe
These No-Bake Peanut Butter Energy Bites are a fantastic snack option. They are packed with energy from the oats and peanut butter, and they satisfy sweet cravings with the mini chocolate chips. Plus, they take only a few minutes to make and require no baking, making them convenient for anyone, even those who might be new to cooking. Whether you need a quick snack before a workout or a sweet treat for your kids, these bites are the perfect solution.
how to make No-Bake Peanut Butter Energy Bites
Ingredients:
- ½ cup quick oats
- ¼ cup peanut butter
- 2 tablespoons honey
- ¼ cup mini chocolate chips
Directions:
- In a medium bowl, combine the quick oats and mini chocolate chips.
- Add the peanut butter and honey to the bowl.
- Stir everything together until well combined.
- Scoop the mixture into 12 balls and roll them between your hands to form bites.
- Store your energy bites in an airtight container, either at room temperature or in the fridge.
how to serve No-Bake Peanut Butter Energy Bites
These energy bites make a perfect snack on their own, but you can also serve them alongside fruit or yogurt for a more substantial treat. They also work great as a post-workout snack or an addition to a school lunch.
how to store No-Bake Peanut Butter Energy Bites
Store your No-Bake Peanut Butter Energy Bites in an airtight container. You can keep them at room temperature for about a week or refrigerate them for a longer shelf life, up to two weeks. Just let them sit out for a few minutes to soften before enjoying.
tips to make No-Bake Peanut Butter Energy Bites
- Mix in some chopped nuts or seeds for added texture and flavor.
- Adjust the sweetness by adding more or less honey, according to your taste.
- For a different twist, try using almond butter or sunflower seed butter instead of peanut butter.
variation
If you want to change things up a bit, consider adding dried fruits like cranberries or raisins for a chewy texture. You can also swap out mini chocolate chips for cacao nibs or coconut flakes.
FAQs
1. Can I use old-fashioned oats instead of quick oats?
Yes, you can use old-fashioned oats, but the texture will be a bit chewier.
2. How long do these energy bites last?
They last about a week at room temperature and up to two weeks if stored in the fridge.
3. Can I freeze these energy bites?
Yes! You can freeze them for up to three months. Just make sure to store them in an airtight container or freezer bag.
4. Easy Low Carb Chicken Casserole

There’s something comforting about the smell of a chicken casserole cooking in the oven. I remember cozy nights spent with family, sharing stories over a warm meal. This Easy Low Carb Chicken Casserole is one of those recipes that brings everyone together. It’s simple to make and perfect for busy weeknights when you want something tasty and healthy. You’ll love the creamy texture and delicious flavors. What’s special about this recipe is that it keeps the carbs low while still satisfying your cravings. It’s the perfect dish for anyone looking to enjoy a hearty meal without the guilt.
why make this recipe
This Easy Low Carb Chicken Casserole is a fantastic choice for several reasons. First, it’s easy to prepare, making it ideal for busy days. Second, it’s packed with protein, thanks to the chicken, while being low in carbs, which is great for those following a low-carb lifestyle. Additionally, it’s a one-dish meal, meaning fewer dishes to wash! You can also customize it based on what you have at home, making it a versatile option for your weekly meal planning.
how to make Easy Low Carb Chicken Casserole
Ingredients:
- 2 cups cooked chicken, shredded
- 1 cup broccoli florets
- 1 cup cauliflower florets
- 1 cup shredded cheese (cheddar or mozzarella)
- 1 cup heavy cream
- 1 teaspoon garlic powder
- 1 teaspoon onion powder
- Salt and pepper to taste
- Optional: chopped fresh herbs for garnish
Directions:
- Preheat your oven to 350°F (175°C).
- In a large mixing bowl, combine the shredded chicken, broccoli, cauliflower, half of the cheese, heavy cream, garlic powder, onion powder, salt, and pepper. Mix well.
- Pour the mixture into a greased casserole dish.
- Sprinkle the remaining cheese on top.
- Bake in the preheated oven for 25–30 minutes, or until the cheese is bubbly and golden.
- Remove from the oven and let it cool slightly before serving.
how to serve Easy Low Carb Chicken Casserole
Serve this delicious casserole hot from the oven. You can add a side salad or steamed vegetables to make the meal more colorful and nutritious. For an extra touch, sprinkle some chopped fresh herbs on top before serving. This dish is filling enough on its own but pairs well with a light meal.
how to store Easy Low Carb Chicken Casserole
Once the casserole is cooled to room temperature, you can store any leftovers in an airtight container. Place it in the refrigerator, where it will stay fresh for up to 3–4 days. When you’re ready to eat, reheat it in the oven or microwave until warmed through.
tips to make Easy Low Carb Chicken Casserole
- Make sure to cook the chicken beforehand to save time.
- Feel free to swap the veggies; spinach or bell peppers work well too.
- If you want a little crunch, add some crushed low-carb crackers on top before baking.
- Adjust the seasoning based on your preferences; add a pinch of paprika or Italian herbs if you like.
variation
You can make this casserole vegetarian by replacing the chicken with cooked quinoa or lentils. For a different flavor, try adding a tablespoon of pesto or BBQ sauce to the mix.
FAQs
1. Can I use leftovers for this casserole?
Yes, leftover cooked chicken works great in this recipe!
2. Is this casserole gluten-free?
Yes, as long as you use gluten-free ingredients, it can easily be made gluten-free.
3. How can I make it dairy-free?
You can use coconut cream instead of heavy cream and a dairy-free cheese substitute for the topping.
5. Big Mac Wraps Recipe – Easy & Delicious Meal Idea

As I stood in my kitchen, the scent of sizzling beef mixed with the tangy aroma of my special sauce filled the air. It reminded me of carefree weekends when my friends and I would indulge in takeout after a long week. That’s why this Big Mac Wraps recipe holds a special place in my heart. It combines the comfort of a classic fast-food favorite with the ease of a homemade meal. You don’t need to spend hours in the kitchen, yet you can create something delicious that everyone will love. These wraps are not just tasty; they bring people together, making them perfect for family dinners or casual gatherings.
why make this recipe
Big Mac Wraps are a fantastic choice for anyone looking for a quick meal that doesn’t skimp on flavor. They are easy to prepare and simple enough for beginners. This recipe allows you to enjoy the classic taste of Big Macs without the need for a drive-thru. With just a few ingredients, you can whip up a batch that satisfies not only your cravings but also saves you time and effort. Plus, they’re versatile, so you can tweak them based on your preferences. It’s a meal that you and your loved ones can enjoy together!
how to make Big Mac Wraps
Ingredients:
- ½ cup mayonnaise
- 2 tbsp finely chopped dill pickles
- 1 tbsp yellow mustard
- 1 tsp white vinegar
- 1 tsp paprika
- ¼ tsp garlic powder
- ¼ tsp onion powder
- 1 lb lean ground beef
- ½ cup finely chopped onion
- Salt and pepper (to taste)
- 4 large flour tortillas
- 1 cup shredded lettuce
- 1 cup shredded cheddar cheese
- Dill pickle slices (optional)
- 1 tbsp olive oil
Directions:
Step 1: Prepare the Special Sauce
In a bowl, mix mayonnaise, dill pickles, yellow mustard, white vinegar, paprika, garlic powder, and onion powder until well combined. Set this sauce aside.
Step 2: Cook the Beef
In a skillet, heat the olive oil over medium heat. Add the chopped onions and cook until they are translucent. Then, add the ground beef, breaking it apart with a spatula. Season with salt and pepper. Cook until the beef is no longer pink, around 7-10 minutes.
Step 3: Assemble the Wraps
Lay a tortilla flat and spread some of the special sauce on it. Add a portion of the cooked beef, followed by lettuce, cheddar cheese, and dill pickle slices if desired.
Step 4: Wrap and Serve
Fold the sides of the tortilla inwards and roll it tightly from the bottom up. Cut in half if desired, and serve immediately.
how to serve Big Mac Wraps
Serve your Big Mac Wraps with extra special sauce on the side for dipping. You can also add some crispy fries or a fresh salad to complete the meal. It’s perfect for sharing with family or friends during a movie night or a casual dinner.
how to store Big Mac Wraps
If you have leftovers, you can store the wraps in an airtight container in the refrigerator for up to 2 days. However, the tortillas may get a bit soggy, so it’s best to keep the ingredients separate until you’re ready to eat.
tips to make Big Mac Wraps
- To make the wraps even more flavorful, try adding some bacon bits or sliced tomatoes.
- If you want a healthier version, swap the ground beef for turkey or a plant-based meat alternative.
- Be creative with your toppings! Avocado, jalapeños, or different kinds of cheese can make the wraps even better.
variation
Feel free to make the wraps vegetarian by using black beans or grilled vegetables in place of the beef. You can also use gluten-free tortillas if you’re avoiding gluten.
FAQs
1. Can I use a different type of meat?
Yes, ground turkey, chicken, or even plant-based alternatives work well in this recipe.
2. How can I make this recipe spicier?
Add some hot sauce or diced jalapeños to the beef mixture or the special sauce for an extra kick.
3. Can I make the special sauce ahead of time?
Absolutely! The special sauce can be made a day in advance and stored in the refrigerator for the best flavor.
6. Sub In A Tub
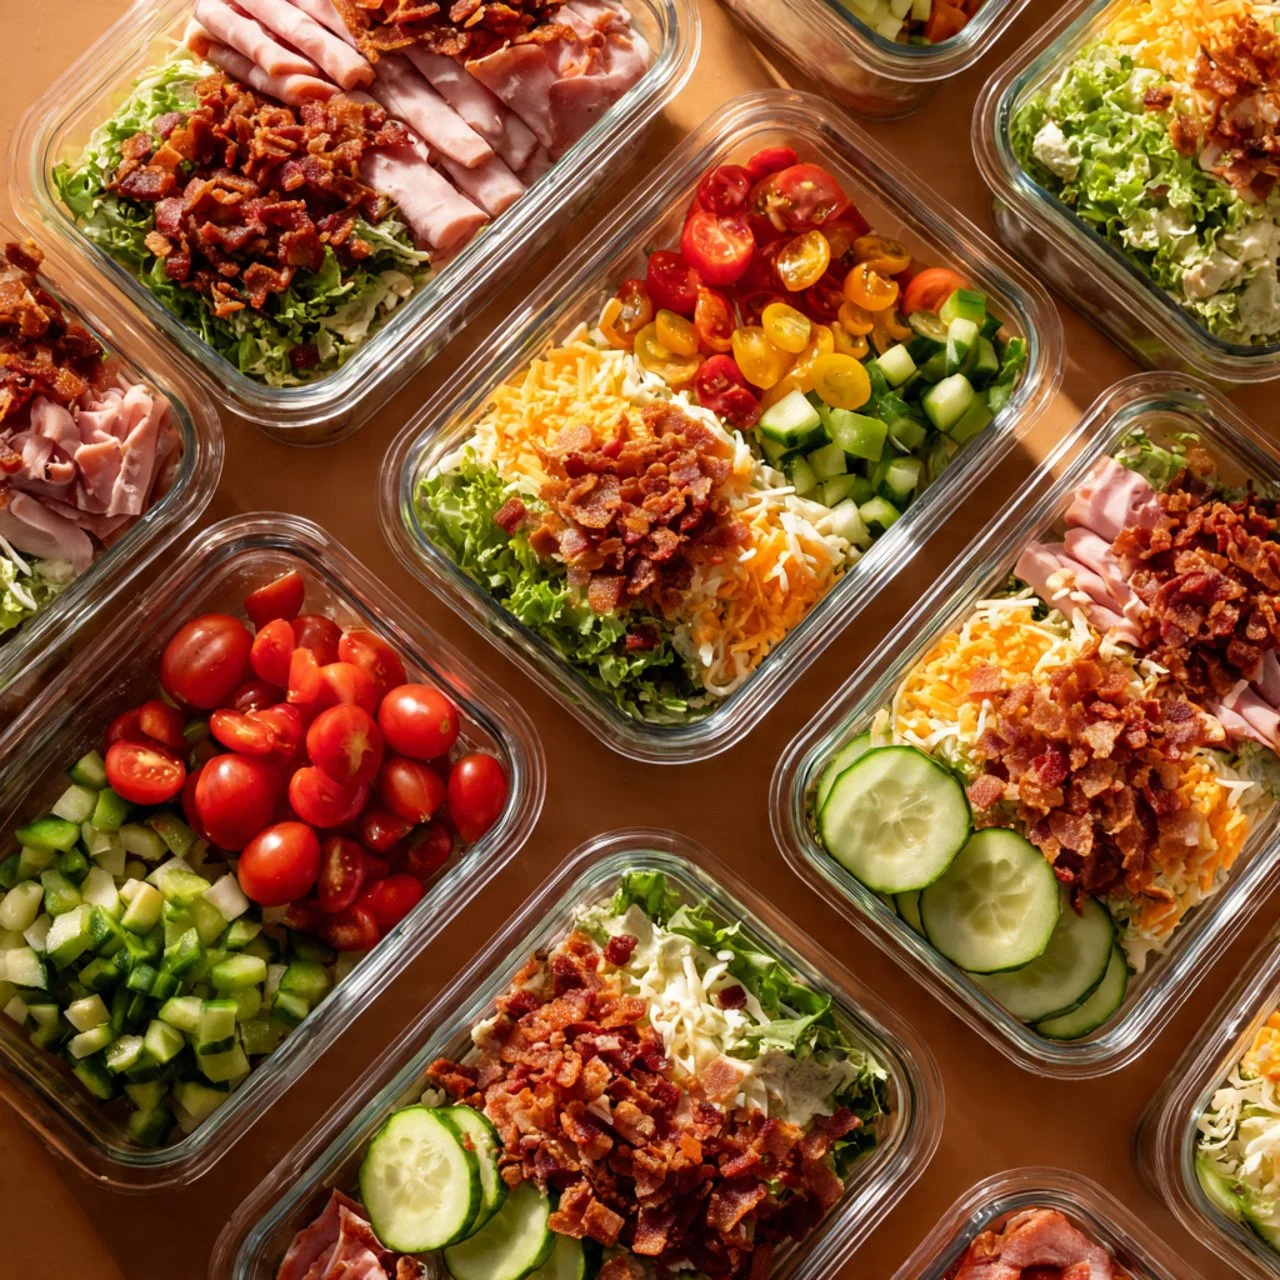
I remember the first time I made Sub In A Tub on a hot summer day. The fresh, crisp vegetables looked so inviting, and each bite was a burst of flavor. We had a picnic in the park, and everyone loved the easy, customizable layers of goodness. This recipe is special because it captures the joy of fresh ingredients without the fuss of rolling up a sandwich. It’s a dish that brings people together—perfect for family gatherings or a quick lunch. Making a Sub In A Tub is not just about the food; it’s about sharing moments and savoring simple pleasures.
why make this recipe
Sub In A Tub is a straightforward and fun way to enjoy the beloved flavors of a sandwich in a fresh and healthy format. It’s quick to prepare, making it an excellent choice for busy days. With its colorful layers, this dish is also visually appealing, which can excite the appetite. Plus, you can customize it with your favorite ingredients or leftovers. It’s a flexible recipe that lets you experiment, and it keeps well, making it a great option for meal prep as well.
how to make Sub In A Tub
Ingredients:
- Lettuce
- Tomatoes
- Onions
- Green peppers
- Olives
- Provolone cheese
- Turkey or ham
- Oil and vinegar dressing
- Salt and pepper
Directions:
- In a bowl, start with a base of shredded lettuce.
- Layer sliced tomatoes, onions, green peppers, and olives on top.
- Add slices of provolone cheese and your choice of turkey or ham.
- Drizzle with oil and vinegar dressing.
- Season with salt and pepper to taste.
- Toss gently and enjoy your Sub In A Tub!
how to serve Sub In A Tub
Serve your Sub In A Tub in individual bowls for a fun and easy meal. You can also serve it on a large platter for family-style dining. It pairs well with chips or a side of fruit for a complete meal.
how to store Sub In A Tub
To store leftover Sub In A Tub, keep it in an airtight container in the refrigerator. It should stay fresh for up to two days. If you have made a larger batch, it’s good to keep the dressing separate to avoid sogginess. Just drizzle the dressing on when you’re ready to eat.
tips to make Sub In A Tub
- Use fresh ingredients for the best flavor and crunch.
- Don’t be afraid to add other veggies like cucumbers or carrots for extra color and nutrition.
- Mix in some herbs like basil or parsley for added freshness.
- If you prefer, substitute the cheese or meat with your favorite alternatives or options like tofu for a vegetarian twist.
variation
You can easily turn Sub In A Tub into a Mediterranean dish by adding feta cheese, artichokes, and cucumbers. Another variation is to use spicy meats or different dressings like ranch or caesar to switch up the flavors.
FAQs
Can I make Sub In A Tub ahead of time?
Yes, you can prepare the ingredients in advance, but it’s best to add the dressing just before serving for freshness.
What if I don’t like turkey or ham?
You can use other deli meats, or even a vegetarian option like chickpeas or grilled vegetables.
Can I use other dressings?
Absolutely! Feel free to try different dressings like ranch, caesar, or a creamy yogurt dressing for variety.
7. Chicken Cordon Bleu Casserole
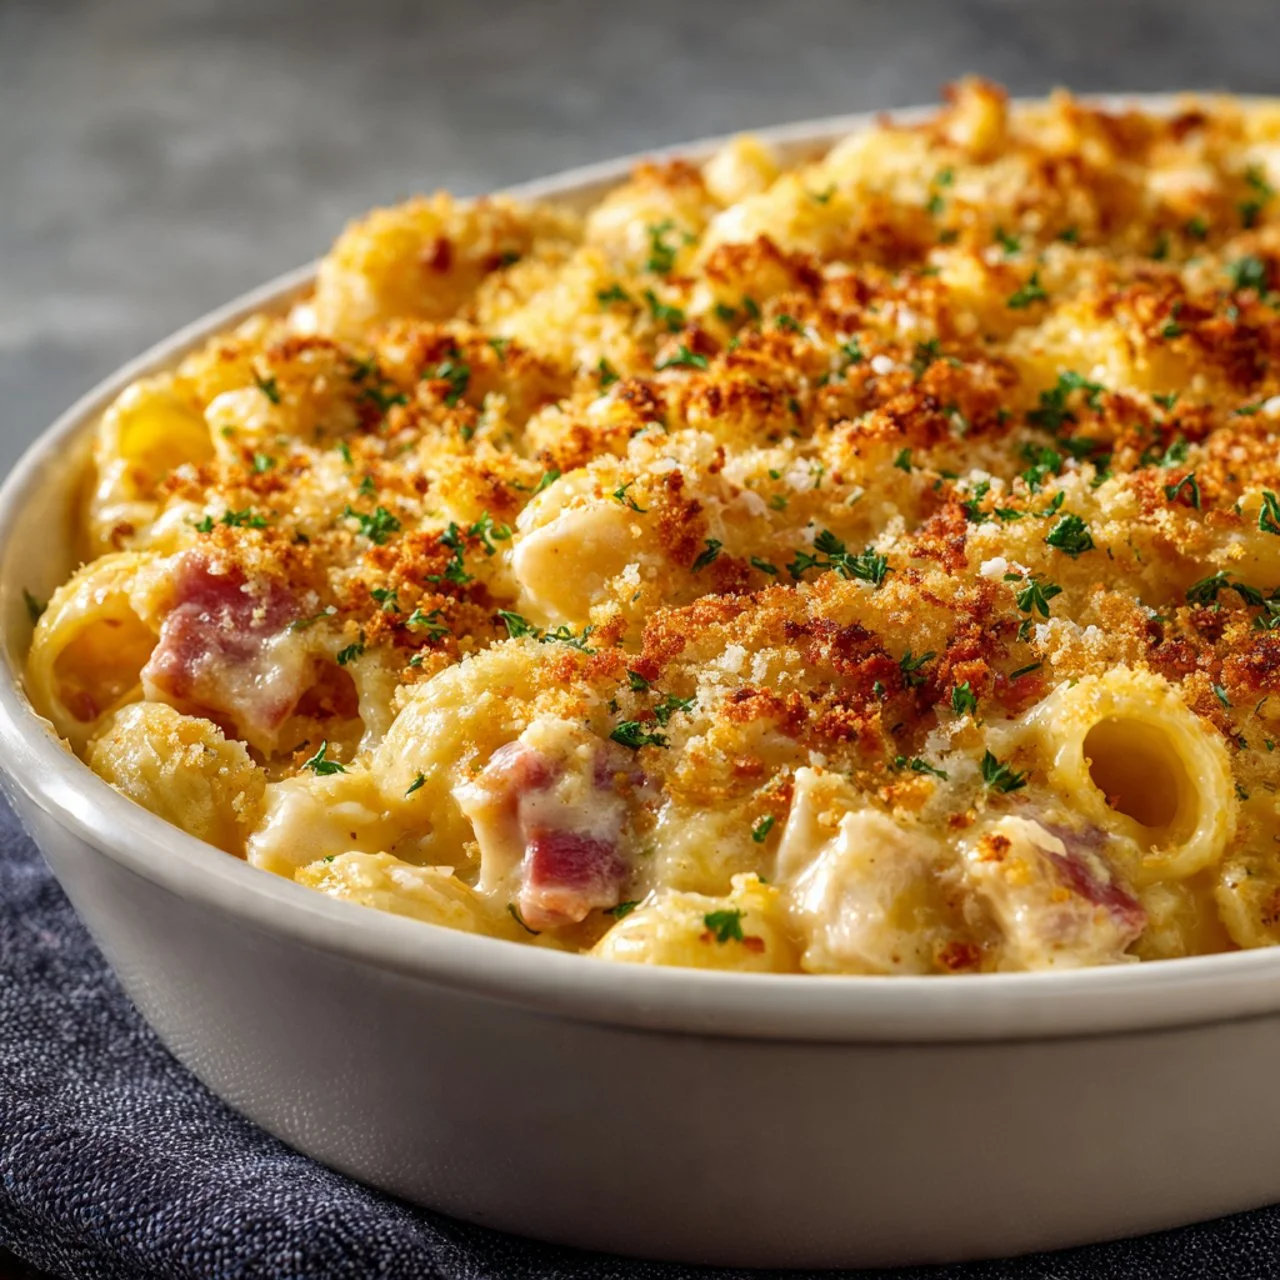
Imagine walking into your kitchen and smelling something warm and cheesy coming from the oven. That’s the magic of Chicken Cordon Bleu Casserole. Growing up, this was one of those meals that brought my family together, and there’s just something comforting about a dish that combines tender chicken, nutty Swiss cheese, and rich creamy sauce. I love how easy it is to whip up, making it perfect for busy weeknights or cozy gatherings. This recipe matters because it transforms classic flavors into a straightforward one-pan meal that everyone will enjoy. What’s special about this casserole is not just its great taste, but how it brings warmth and togetherness to the table.
why make this recipe
Making Chicken Cordon Bleu Casserole is all about delighting your taste buds while simplifying your cooking. This recipe packs in flavors of the beloved Chicken Cordon Bleu but presents it in a convenient casserole form. With crunchy panko topping and gooey, melted cheese, it’s a dish that’s both satisfying and easy to prepare. Plus, you get to use rotisserie chicken, which saves you time in the kitchen. Serve it to friends and family, and watch as their faces light up with delight.
how to make Chicken Cordon Bleu Casserole
Ingredients
- 1 lb cavatappi pasta
- 2 cans (10.5 oz each) cream of chicken soup
- 2 cups half & half
- 3 tablespoons Dijon mustard
- 1 tablespoon fresh parsley, chopped
- 1 teaspoon seasoned salt (e.g., Lawry’s)
- ½ teaspoon black pepper
- 3 cups shredded Swiss cheese
- 2 cups rotisserie chicken, diced
- 1 tablespoon unsalted butter, melted
- ¾ cup plain panko bread crumbs
- ¼ cup grated Parmesan cheese
Directions
- Preheat your oven to 350°F (175°C).
- Cook the cavatappi pasta according to the package instructions. Drain and set aside.
- In a large bowl, combine the cream of chicken soup, half & half, Dijon mustard, parsley, seasoned salt, and black pepper.
- Stir in the cooked pasta, shredded Swiss cheese, and diced rotisserie chicken until well mixed.
- Pour the mixture into a 9×13 inch baking dish.
- In a separate bowl, mix together the melted butter, panko bread crumbs, and grated Parmesan cheese. Sprinkle this mixture evenly on top of the casserole.
- Bake for about 25-30 minutes or until the top is golden brown and bubbly.
how to serve Chicken Cordon Bleu Casserole
Serve this casserole hot from the oven, garnished with a sprinkle of fresh parsley for a pop of color. Pair it with a simple side salad or steamed vegetables for a balanced meal. It’s a crowd-pleaser that works great for family dinners or potlucks.
how to store Chicken Cordon Bleu Casserole
If you have leftovers, let the casserole cool completely before storing. Place it in an airtight container in the refrigerator, where it will last for about 3-4 days. You can also freeze the casserole before baking it. Just cover it tightly and keep it in the freezer for up to two months. When you’re ready to enjoy it again, allow it to thaw in the refrigerator overnight, then bake as directed.
tips to make Chicken Cordon Bleu Casserole
- For extra flavor, consider adding some cooked bacon or ham with the chicken.
- If you prefer a lighter version, use low-fat cream of chicken soup and half & half.
- To make it a bit spicy, add a dash of cayenne pepper to the sauce mixture.
variation
You can easily adapt this casserole by using different types of cheese like cheddar or pepper jack for a different flavor profile. Additionally, swap out the pasta for quinoa or rice to suit your dietary preferences.
FAQs
1. Can I use uncooked chicken instead of rotisserie chicken?
Yes, you can use uncooked chicken. Just cook it thoroughly before adding it to the casserole.
2. Can I make this casserole ahead of time?
Absolutely! You can prepare it a day in advance and store it in the refrigerator before baking. Just increase the baking time if it’s cold from the fridge.
3. Is this dish suitable for freezing?
Yes, this casserole freezes well. Just ensure it’s properly wrapped to avoid freezer burn.
8. Bang Bang Salmon Bites
There’s something truly delightful about digging into a bowl of warm, crispy goodness. The first time I made Bang Bang Salmon Bites, I could hardly wait for them to come out of the oven. The smell of seasoned salmon and the crunch of panko breadcrumbs filled my kitchen, teasing my senses. As I bit into one of those golden bites, it was a moment of pure joy; the flavors danced together perfectly. This recipe matters because it brings comfort and excitement into a simple weeknight dinner. You’ll find the salmon bites are not only easy to make but also incredibly satisfying, especially paired with colorful veggies and creamy avocado. What makes this recipe special is its perfect balance of flavors and textures, making it a dish everyone will love.
why make this recipe
Bang Bang Salmon Bites are a great choice for several reasons. First, they bring a fun twist to traditional salmon dishes, making them more exciting. Second, they are packed with flavor and texture, adding crunch and spice to your meal. With quick prep and cooking times, this recipe suits busier nights without sacrificing taste. Plus, you get a wholesome dish that combines fresh fish with nutritious vegetables, making it a well-rounded option for the family.
how to make Bang Bang Salmon Bites
Ingredients:
- 1 lb fresh salmon (skinless and cut into bite-sized cubes)
- 1 tsp garlic powder
- 1 tsp smoked paprika
- ½ tsp salt
- ½ tsp black pepper
- 1 cup panko breadcrumbs
- 1 tbsp olive oil or spray for crisping
- ½ cup mayonnaise
- 2 tbsp sweet chili sauce
- 1 tbsp sriracha (adjust to spice level)
- 1 tsp honey (optional)
- Juice of ½ lime
- 2 cups cooked jasmine rice (or cauliflower rice)
- 1 cup shredded purple cabbage
- 1 avocado (sliced)
- ½ cup shredded carrots
- 2 green onions (sliced)
- Fresh cilantro and sesame seeds for garnish
Directions:
- Preheat Oven or Air Fryer: Set your oven to 400°F (200°C) or your air fryer to 375°F (190°C).
- Season the Salmon: In a bowl, mix the salmon cubes with garlic powder, smoked paprika, salt, and black pepper.
- Coat in Breadcrumbs: Take the seasoned salmon and coat each piece in panko breadcrumbs for that crispy outer layer.
- Bake or Air-Fry: Place the coated salmon on a baking sheet or in the air fryer. Cook for about 10-12 minutes or until crispy and cooked through.
- Make the Bang Bang Sauce: In a small bowl, mix mayonnaise, sweet chili sauce, sriracha, honey, and lime juice until smooth.
- Assemble the Bowls: Serve the crispy salmon bites over cooked jasmine rice or cauliflower rice. Top with shredded cabbage, avocado slices, carrots, and green onions. Drizzle the Bang Bang sauce over the top and garnish with cilantro and sesame seeds.
how to serve Bang Bang Salmon Bites
Serve your Bang Bang Salmon Bites as a fun dinner option or as a delightful appetizer. Pair them with fresh veggies and a tasty rice base, and don’t forget the Bang Bang sauce for dipping. You can enjoy these bites in bowls or on plates, with colorful toppings adding to the presentation.
how to store Bang Bang Salmon Bites
To store leftovers, place the uneaten salmon bites in an airtight container in the refrigerator. They can last for up to 2 days. Reheat them in the oven to regain their crispiness or use a microwave for a quicker option, though this may make them a bit softer.
tips to make Bang Bang Salmon Bites
- For extra crispiness, ensure that the salmon pieces are well coated in the panko breadcrumbs.
- Adjust the amount of sriracha in the sauce to fit your preferred spice level.
- Feel free to use other types of fish, like cod or tilapia, for a different flavor and texture.
variation
You can try adding different spices to the salmon, such as cayenne for heat or lemon zest for a fresher taste. You can also substitute the panko with crushed crackers or make it gluten-free using gluten-free breadcrumbs.
FAQs
1. Can I use frozen salmon for this recipe?
Yes, you can use frozen salmon. Just make sure to thaw it completely and pat it dry before seasoning and breading.
2. What if I don’t have panko breadcrumbs?
You can substitute regular breadcrumbs or even crushed cornflakes for a different texture.
3. Can I make the Bang Bang sauce ahead of time?
Absolutely! You can prepare the sauce in advance and store it in the refrigerator for up to a week. It’s great for other dishes too!
9. Cottage Cheese Chicken Parmesan Bowl
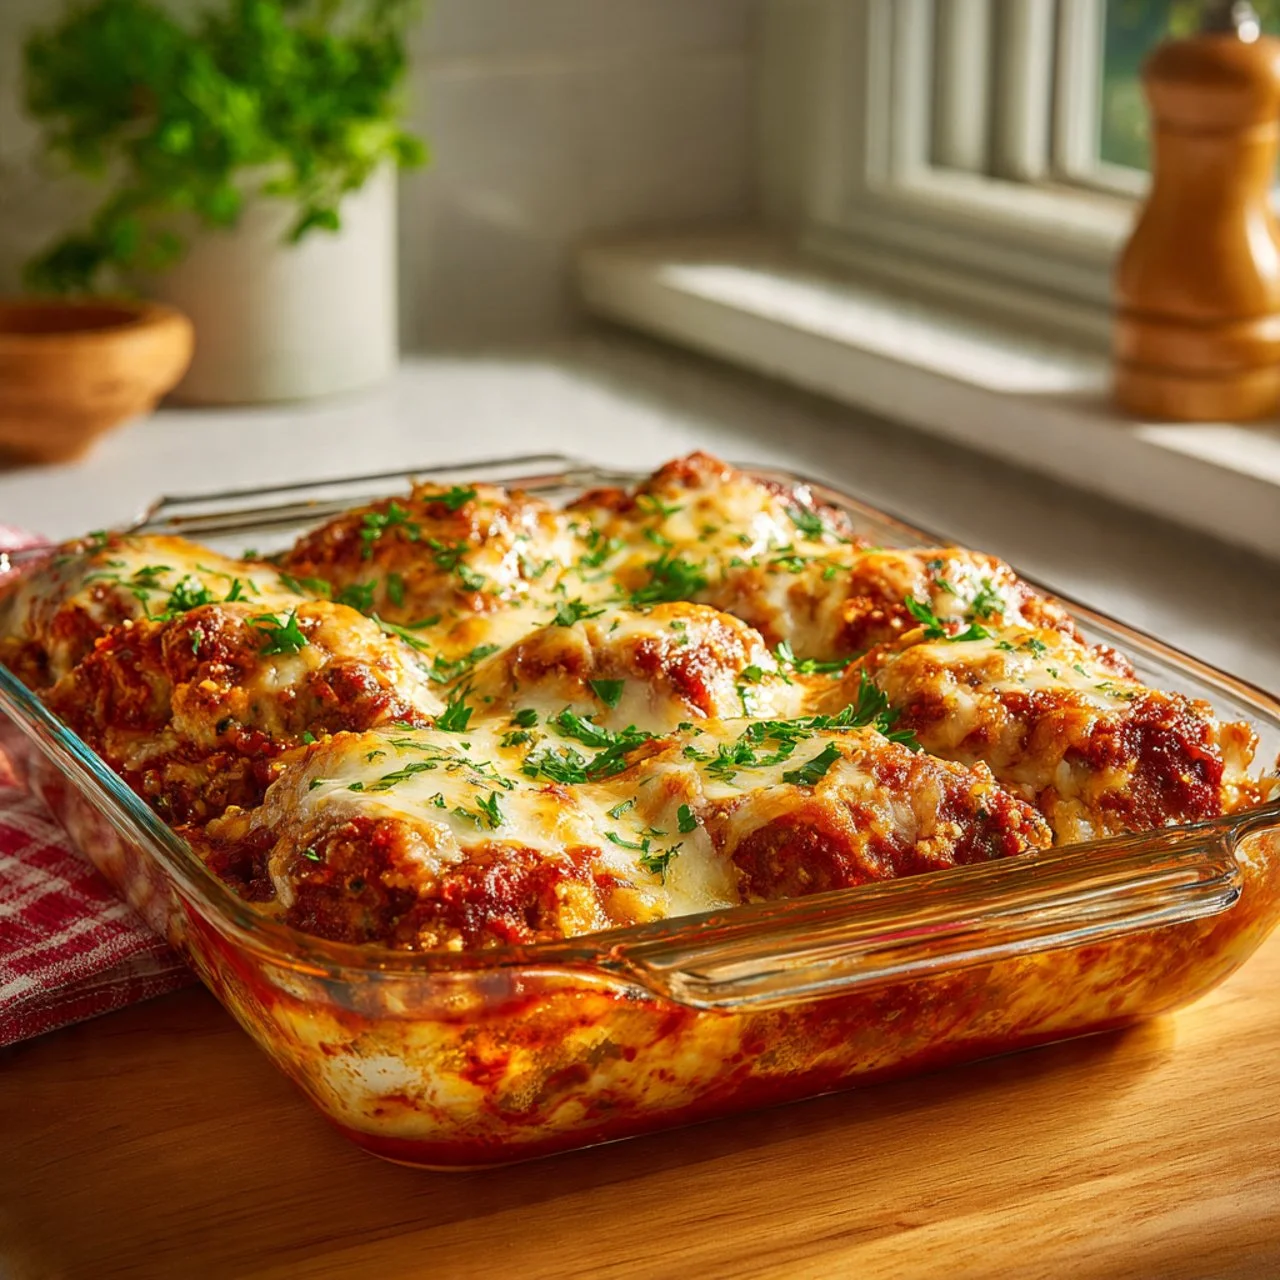
As a child, I loved the rich aromas wafting through my kitchen when my mom made chicken parmesan. The crispy chicken, melting cheese, and tangy tomato sauce always created a warm haven for my family. Today, I still cherish those moments and try to recreate them in a healthier way, which is why the Cottage Cheese Chicken Parmesan Bowl has a special place in my heart. You can enjoy all the flavors you love from traditional chicken parmesan but with a twist that swaps heavy sauces and loads of cheese for lighter ingredients. It makes a lovely dish for a cozy dinner or a comfort food lunch, bringing a sense of home and nostalgia into your kitchen.
why make this recipe
The Cottage Cheese Chicken Parmesan Bowl is a great choice for anyone looking for a flavorful yet healthier meal. Using cottage cheese instead of heavy mozzarella gives you a boost of protein and makes it lighter. It’s easy to prepare, and you can have it on the table in about 30 minutes. Plus, it’s loaded with flavor and sure to satisfy your cravings. Whether you’re cooking for yourself, your family, or friends, this dish is delicious for everyone.
how to make Cottage Cheese Chicken Parmesan Bowl
Ingredients:
- 2 boneless, skinless chicken breasts
- 1 cup cottage cheese
- 1 cup marinara sauce
- 1 cup breadcrumbs
- 1 teaspoon Italian seasoning
- 1 teaspoon garlic powder
- 1/2 teaspoon salt
- 1/2 teaspoon black pepper
- Olive oil for cooking
- Fresh basil for garnish (optional)
Directions:
- Preheat your oven to 375°F (190°C).
- In a bowl, mix the breadcrumbs, Italian seasoning, garlic powder, salt, and pepper.
- Coat each chicken breast with a thin layer of olive oil and then dip into the breadcrumb mixture, pressing gently to help it stick.
- Place the coated chicken breasts on a baking sheet and bake for 25-30 minutes or until the chicken is cooked through and no longer pink in the center.
- In the last 5 minutes of cooking, remove the chicken from the oven and spread a layer of cottage cheese on top of each breast.
- Pour marinara sauce over the cottage cheese and return the chicken to the oven until everything is heated through.
- Remove from the oven, garnish with fresh basil if desired, and serve warm.
how to serve Cottage Cheese Chicken Parmesan Bowl
You can serve this dish in bowls, topping your chicken with extra marinara sauce or some fresh basil for a pop of color. Pair it with a simple side salad or steamed veggies to round out your meal. You can also serve it over cooked pasta or quinoa for added texture and nourishment.
how to store Cottage Cheese Chicken Parmesan Bowl
If you have leftovers, let the dish cool down to room temperature. Store them in an airtight container in the refrigerator for up to 3 days. You can also freeze it for up to a month. Just be sure to allow it to thaw in the fridge overnight before reheating.
tips to make Cottage Cheese Chicken Parmesan Bowl
- For extra crunch, consider air-frying the chicken instead of baking it.
- Feel free to switch up the marinara sauce with your favorite pizza sauce for a different flavor.
- Adding some spinach or other veggies in the marinara sauce can boost the nutrition even further.
variation
You can customize this recipe by swapping the chicken for turkey breasts or even eggplant for a vegetarian version. You can also experiment with different kinds of cheese if you prefer something other than cottage cheese, such as ricotta.
FAQs
Can I prepare this dish ahead of time?
Yes! You can prep the chicken and breadcrumb mixture the night before. Just keep everything covered in the fridge until you’re ready to bake it.
Is it gluten-free?
You can make this dish gluten-free by using gluten-free breadcrumbs or almond flour as a coating.
Can I use frozen chicken for this recipe?
It’s best to thaw chicken breasts before cooking for even seasoning and cooking. If using frozen chicken, make sure it is fully thawed and dried before coating it.
10. Creamy Beef Pasta
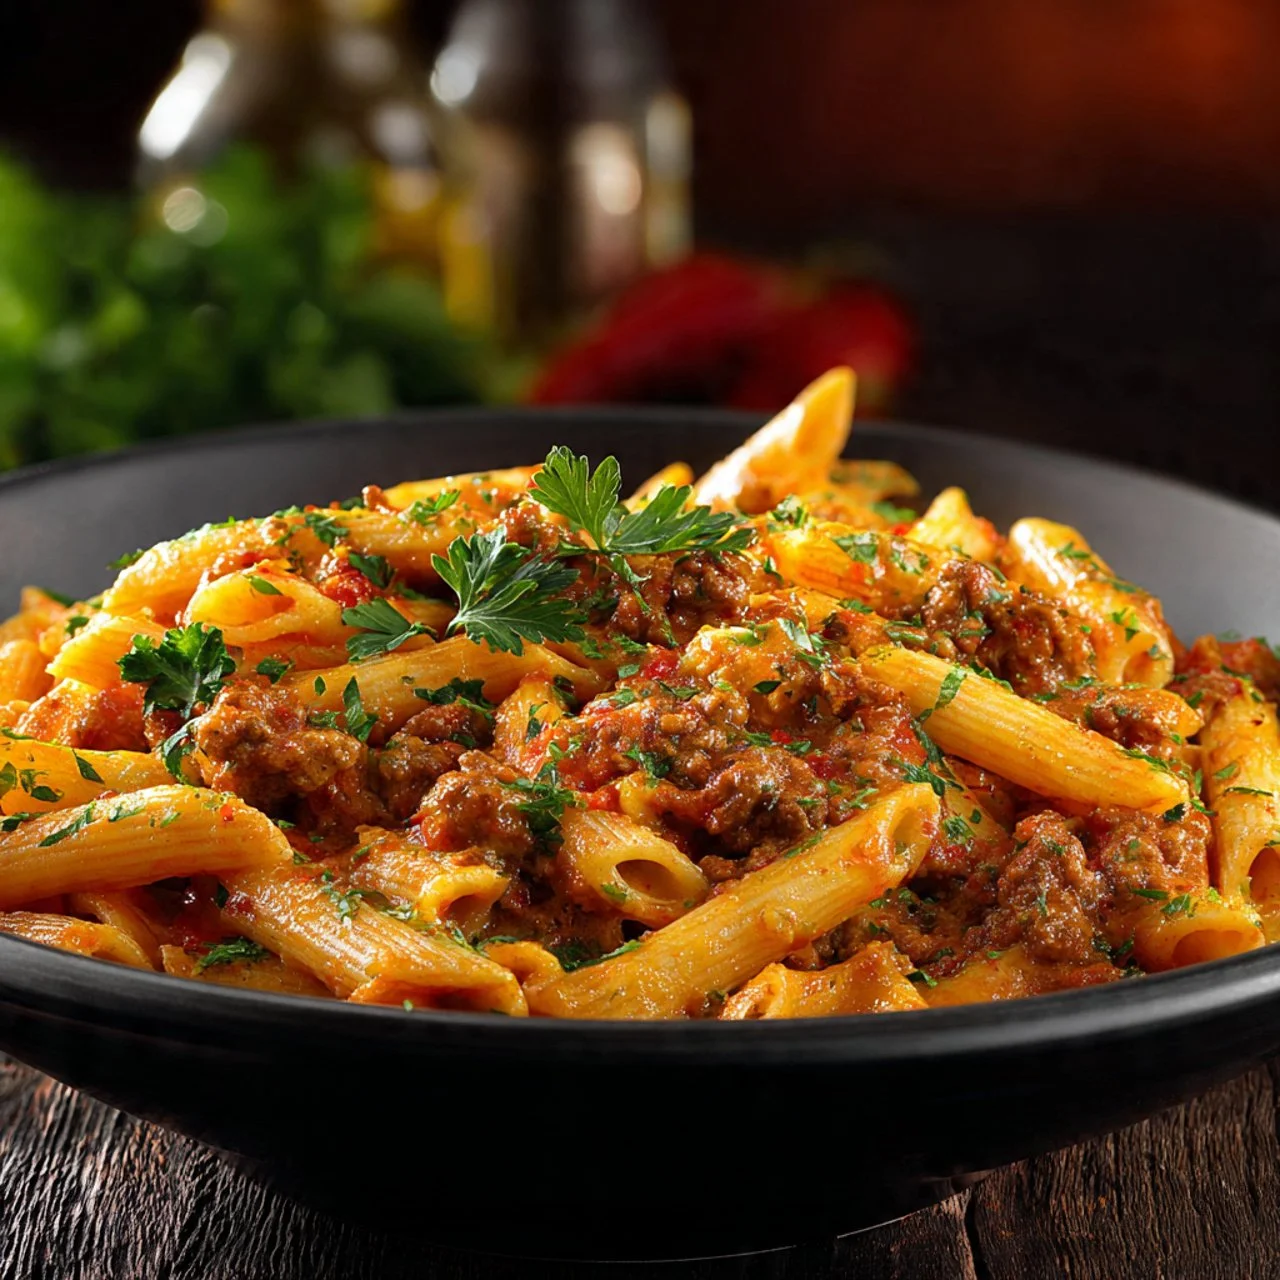
There’s something comforting about a warm bowl of creamy pasta, especially after a long day. I remember the first time I made this creamy beef pasta; the aroma filled my kitchen, and I felt a sense of joy just knowing a delicious meal was on the way. This dish brings back memories of family gatherings and simple evenings at home. You’ll find that this creamy beef pasta not only satisfies hunger but also warms the heart. It’s a recipe that gives you the chance to unwind, enjoy hearty flavors, and share with those you love. The blend of cream, beef, and seasoning makes it truly special.
why make this recipe
Creamy beef pasta is perfect for a weeknight dinner or a leisurely weekend meal. It’s quick to prepare, requires minimal ingredients, and offers a delightful combination of flavors. This recipe is both filling and satisfying, making it great for everyone at the table. Whether you have a busy schedule or just want a cozy night in, this dish brings comfort with every bite. Plus, you can easily customize it to fit your tastes!
how to make Creamy Beef Pasta
Ingredients
- 8 oz penne pasta
- 1 lb lean ground beef
- 1 cup heavy cream
- 3 cloves garlic, minced
- 1 medium onion, diced
- 1 cup grated Parmesan cheese
- 2 tsp Italian seasoning
- Salt and pepper to taste
- 2 tsp olive oil for sautéing
Directions
- Cook the penne according to package instructions until al dente. Drain and reserve 1 cup of pasta water.
- In a large skillet over medium heat, add olive oil. Sauté the diced onion and minced garlic until fragrant (about 5 minutes).
- Add ground beef to the skillet, breaking it apart as it cooks until browned (about 7 minutes). Season with salt, pepper, and Italian seasoning.
- Lower heat and stir in heavy cream. Gradually add reserved pasta water until desired sauce consistency is reached. Mix in grated Parmesan until melted.
- Combine cooked pasta with the sauce in the skillet, tossing gently to coat.
- Serve hot, garnished with additional Parmesan or fresh parsley if desired.
how to serve Creamy Beef Pasta
Serve your creamy beef pasta with a sprinkle of fresh parsley or extra Parmesan on top. It pairs wonderfully with a side salad or some crusty bread to soak up the delicious sauce. Enjoy it warm with family or friends for a delightful meal.
how to store Creamy Beef Pasta
To store any leftovers, let the creamy beef pasta cool completely, then transfer it to an airtight container. It can be kept in the refrigerator for up to three days. For longer storage, consider freezing it. Just make sure to reheat it thoroughly before enjoying again.
tips to make Creamy Beef Pasta
- Feel free to add vegetables like bell peppers or spinach for extra flavor and nutrition.
- Adjust the amount of cream and pasta water based on how creamy you want the sauce.
- Use freshly grated Parmesan for the best taste.
variation (if any)
For a lighter version, you can substitute ground turkey or chicken in place of beef. You can also use whole grain pasta or a gluten-free pasta option for those with dietary restrictions.
FAQs
Can I use a different type of pasta?
Yes, you can use any pasta shape you prefer. Just adjust the cooking time according to the package instructions.
How can I make this dish spicier?
Add some red pepper flakes or a dash of hot sauce while cooking the ground beef for extra heat.
Can I make this ahead of time?
You can prepare the sauce in advance and cook the pasta right before serving. This saves time and still gives you a fresh meal!