
Frozen S’mores are the dessert of the summer: cool, creamy, chocolaty, and just the right amount of nostalgic. This article walks you through exactly how to make them, plus tips for the best results, flavor upgrades, and answers to your most common questions. Whether you’re looking to prep ahead for a party or just satisfy your sweet tooth on a hot day, frozen s’mores are a must-try. In this guide, you’ll learn the story behind the treat, how to build it like a pro, easy substitutions, and how to store them for lasting texture.
Table of Contents
Why Everyone’s Obsessed with Frozen S’mores
That First Frozen Bite
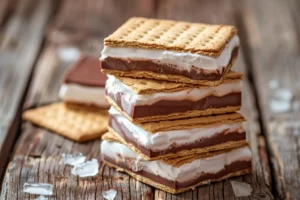
Hi, I’m Sarah Whitmore, and my obsession with frozen s’mores started on a muggy Vermont evening after a neighborhood bonfire. We were out of chocolate bars and had a half tub of whipped topping in the freezer. I got creative, layered pudding and fluff between grahams, and froze it out of curiosity. That accidental experiment became the dessert I now pull out every summer. Frozen s’mores are sweet but not heavy, with a cold crunch that instantly cools you down. They’re easy, no-bake, and a terrific way to mix up the usual ice cream lineup.
I’ve tried dozens of versions since then some with chocolate chips, others vegan like in this frozen fruit and yogurt recipe and what’s amazing is how adaptable they are. You can make them with protein pudding, layer them into bars, or swap marshmallow fluff for cream cheese for a tangy twist. My personal go-to still uses instant pudding and a touch of marshmallow creme for that perfect chewy texture when frozen.
The Perfect Summer Dessert
What makes frozen s’mores such a hit is the balance of texture and nostalgia. You get the classic graham-cracker crunch, gooey marshmallow flavor, and smooth, cold chocolate filling in every bite. Plus, they’re make-ahead friendly, kid-approved, and easier to manage than a live fire pit. You can find the same make-ahead magic in recipes like these frozen fruit cups and frozen fruit bar recipes, too.
The only downside? They disappear fast. I recommend making a double batch you won’t regret it.
How to Make Frozen S’mores at Home
Simple Ingredients, Big Flavor
The magic of frozen s’mores lies in their simplicity. You only need a few easy-to-find ingredients, and chances are you already have most of them. The base? Graham crackers. Then comes the creamy duo: chocolate pudding and whipped topping, both layered over marshmallow fluff or cream cheese. These layers freeze into a smooth, ice cream-like texture with just enough structure to hold between your fingers.
Here’s what you’ll need:
- Graham crackers (original or honey)
- Instant chocolate pudding mix (5.9 oz box)
- Cold milk
- Whipped topping (like Cool Whip)
- Marshmallow fluff or cream cheese (or a mix!)
- Optional: mini chocolate chips, peanut butter swirl, or fruit puree
You can see this easy frozen layering method echoed in treats like these frozen fruit ice pops or frozen fruit sorbet, which also rely on creamy bases and quick freezing.
Frozen S’mores Recipe: A Cool Twist on a Campfire Classic
Ingredients
- All you need to make frozen s’mores
- 1 box graham crackers
- 1 package 5.9 oz instant chocolate pudding mix
- 2 ½ cups cold milk
- 1 tub 8 oz whipped topping, thawed
- 1 cup marshmallow fluff or ½ cup fluff + ½ cup cream cheese
- Optional: mini chocolate chips or sliced banana
Method
- 1. Line a 9×13-inch pan with foil or parchment paper, leaving overhang for easy lifting.
- 2. Arrange half the graham crackers in a single layer on the bottom of the pan.
- 3. In a bowl, prepare chocolate pudding using 2 ½ cups milk. Let it set for 5 minutes.
- 4. Fold half the whipped topping into the pudding to lighten it.
- 5. In another bowl, combine remaining whipped topping with marshmallow fluff (or cream cheese mixture).
- 6. Spread the marshmallow layer evenly over graham crackers.
- 7. Top with the pudding layer and smooth the top.
- 8. Place remaining graham crackers over the pudding to match the bottom layer.
- 9. Cover and freeze for at least 4 hours or overnight.
- 10. Lift from pan, cut into squares along graham lines, and serve.
Nutrition
Notes
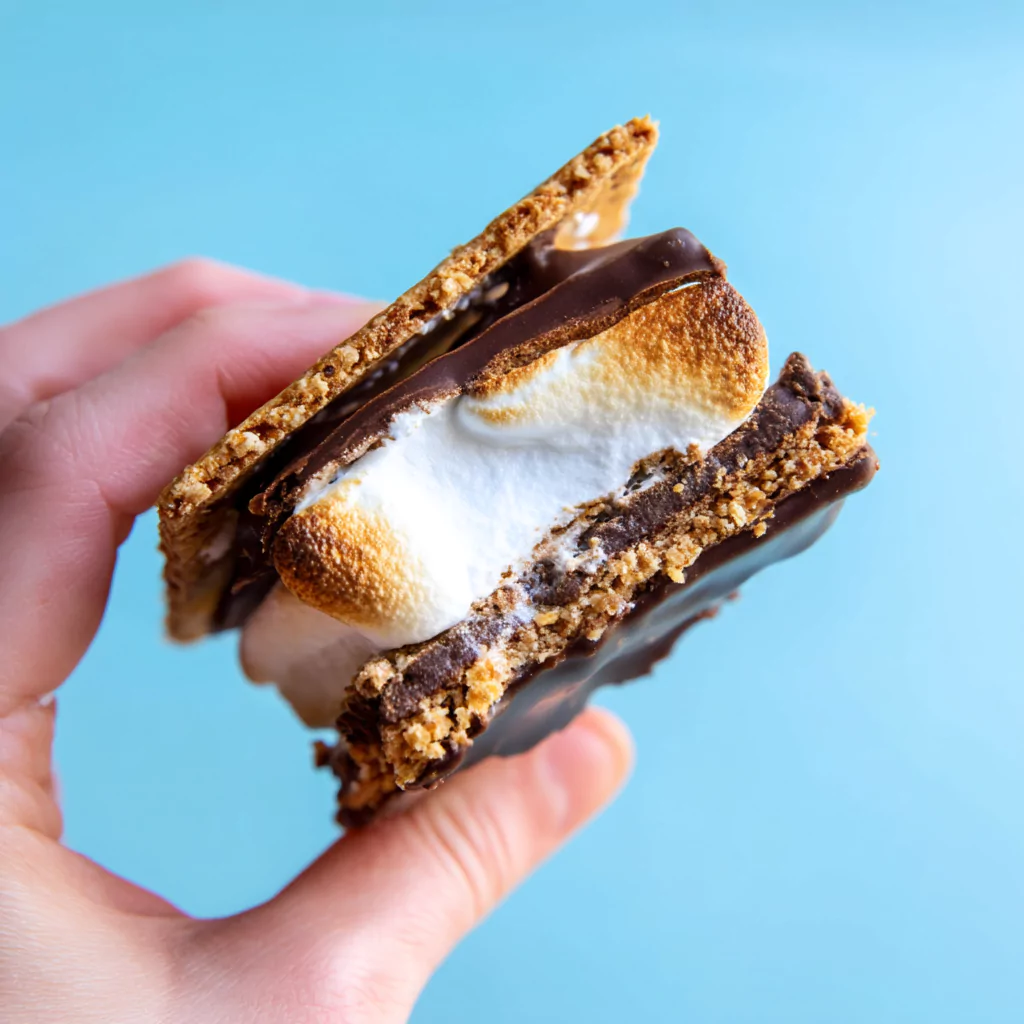
Step-by-Step Assembly
Start by making the chocolate pudding according to package directions, but use a little less milk for a thicker texture. Once it sets, fold in half of the whipped topping for extra volume. Separately, mix the marshmallow fluff with the rest of the whipped topping (or blend with softened cream cheese for a richer, tangier version).
Next, line a square pan with foil or parchment and lay out a layer of graham crackers. Spread the marshmallow mixture over them, followed by the chocolate layer. Top with more grahams, gently pressing to create sandwich shapes. Freeze for at least 4 hours or overnight for best texture.
Once firm, slice between crackers, wrap individually in foil or parchment, and pop them back in the freezer. These hold beautifully for up to a week and become even more enjoyable with a quick thaw before serving.
This prep method is almost identical to how you’d layer popsicles from frozen fruit: thin, even layers help them freeze evenly, while grahams give you that perfect handheld crunch.
you can take a look to my facebook page.
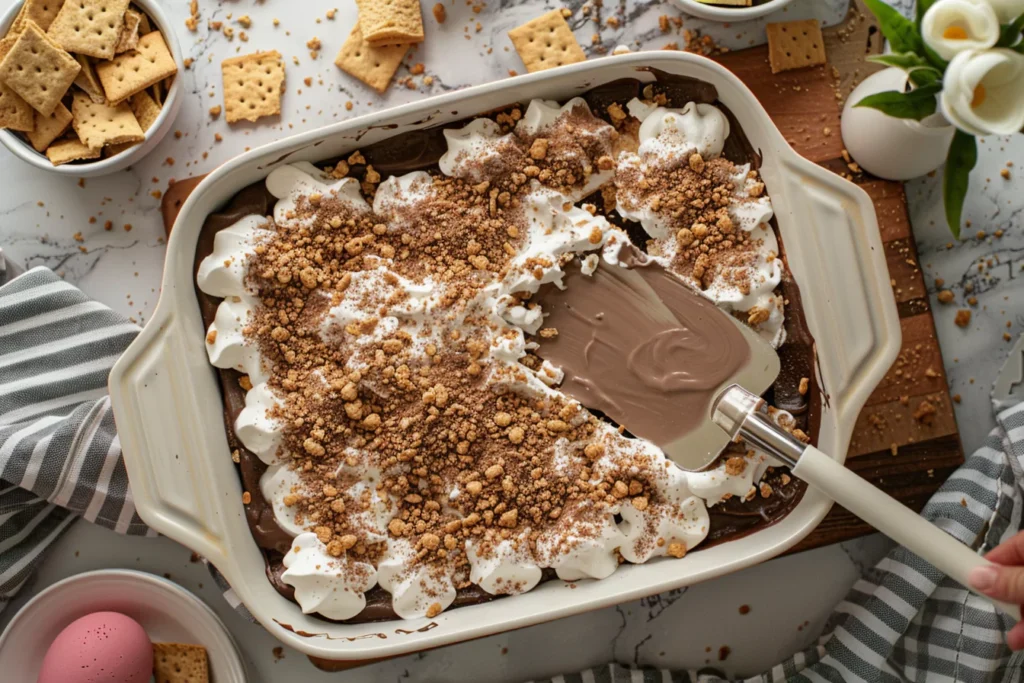
Frozen S’mores Variations You’ll Love
Creative Twists That Work
One of the reasons I keep coming back to frozen s’mores is how easy they are to customize. Once you’ve nailed the base method, there are endless ways to switch up the flavors and textures. Here are a few favorites that I’ve tested (and devoured):
- Peanut Butter Swirl: Add a layer of peanut butter between the fluff and pudding. It firms up beautifully and adds that salty punch.
- Cookies & Cream: Swap graham crackers with chocolate sandwich cookies for a decadent crunch.
- Fruit-Forward: Layer sliced bananas or strawberries between the pudding and marshmallow. These mimic the refreshing flavor in frozen fruit smoothies without yogurt but in solid form.
- Vegan/Dairy-Free: Use plant-based pudding, whipped coconut cream, and vegan grahams. This version is cool and creamy without sacrificing taste.
For parties or barbecues, cut them smaller and serve in mini cupcake liners for easy grab-and-go bites. The same entertaining trick works well with frozen fruit cups too.
Tips for Best Results
To get those clean, sharp layers and a perfect bite, follow these tips:
- Use slightly softened pudding and marshmallow mix when assembling. It spreads smoother and firms up evenly.
- Line your pan with parchment or foil, and leave extra on the sides so you can lift everything out easily before slicing.
- Don’t over-freeze. Overnight is best, but longer than 2 days can make grahams extra hard, just thaw for 5 minutes before serving.
- Wrap slices individually after freezing for easy access and storage. This is especially helpful if you’re stacking them like you would with frozen fruit bars.
Frozen s’mores are forgiving and fun, which means experimenting won’t derail the final dessert. Keep the base recipe handy, but don’t be afraid to mix in textures and toppings that match your cravings.
Frozen S’mores FAQs You Should Know
What ingredients do you need for frozen s’mores?
To make frozen s’mores, you need graham crackers, instant chocolate pudding mix, milk, whipped topping, and either marshmallow fluff or cream cheese (or both). These combine to create a creamy, cold dessert with nostalgic flavors and layers that freeze well. For fun add-ins, you can mix in crushed cookies, berries, or swirl in some nut butter. If you’re already making treats like frozen fruit and yogurt or frozen fruit smoothies, you’ll probably have many of the ingredients on hand.
How long do frozen s’mores need to set?
For best results, freeze the assembled s’mores for a minimum of 4 hours. Overnight is ideal for that solid, sliceable texture. If you’re short on time, a deep freezer can get the job done in as little as 3 hours. Don’t skip the chilling this is what transforms them from layered pudding bars into structured handheld treats. They should feel firm to the touch and hold their shape once sliced.
Can I make frozen s’mores ahead of time?
Yes, frozen s’mores are a dream for make-ahead prep. Once assembled and cut, you can store them in an airtight container or wrap them individually. They stay fresh in the freezer for 5–7 days. Just be sure to let them thaw for 3–5 minutes before serving to soften the graham crackers slightly. These are as freezer-friendly as popsicles from frozen fruit, and just as refreshing.
How do you store frozen s’mores for best texture?
The key is to keep air out. After cutting them into bars or sandwiches, wrap each piece in wax paper or parchment, then seal in a zip-top bag or airtight container. This prevents freezer burn and keeps the crackers from drying out. For added freshness, you can store them in the coldest part of the freezer, usually the back wall. It’s the same trick used for keeping eating frozen fruit snacks perfectly preserved.
Conclusion
Frozen s’mores are more than just a clever twist on a campfire classic, they’re an easy, no-bake dessert that checks every summer box: sweet, cold, nostalgic, and fast. Whether you layer them traditionally, go vegan, or load them with peanut butter and bananas, there’s no wrong way to enjoy them. They’re a hit with kids and adults alike, and best of all, they’re always ready in your freezer when cravings strike. Keep this recipe handy, you’ll find yourself making it again and again.